User import
User import allows you to bring users from groups defined in Microsoft Entra ID (Azure) into Gredit, avoiding manual creation one by one. The system also runs an automatic scheduled sync once per day.
Step 1 — Microsoft Entra ID
1. Data you will need
| Data | Where to find it |
|---|---|
| Tenant (directory) ID | General info of the tenant or application |
| Application (client) ID | Application registration |
| Client secret (value, not the ID) | Certificates and secrets of the registration |
| Object ID of each Azure group to link to a Gredit role | Group page → Overview |
2. Create (or review) the application registration
- Go to the Microsoft Entra admin center (or the classic Azure portal → Microsoft Entra ID).
- Go to App registrations → New registration (if one for Gredit doesn't exist yet).
- Enter a clear name (e.g.
Gredit - user import). - Account type: according to your organization (usually accounts in this directory only).
- Register.
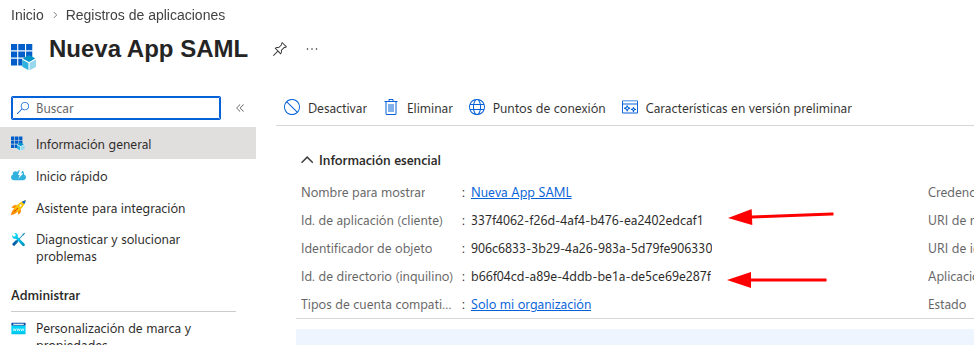
- On the application page, copy:
- Application (client) ID → will be the Client ID in Gredit.
- Directory (tenant) ID → will be the Tenant ID in Gredit.
3. Client secret
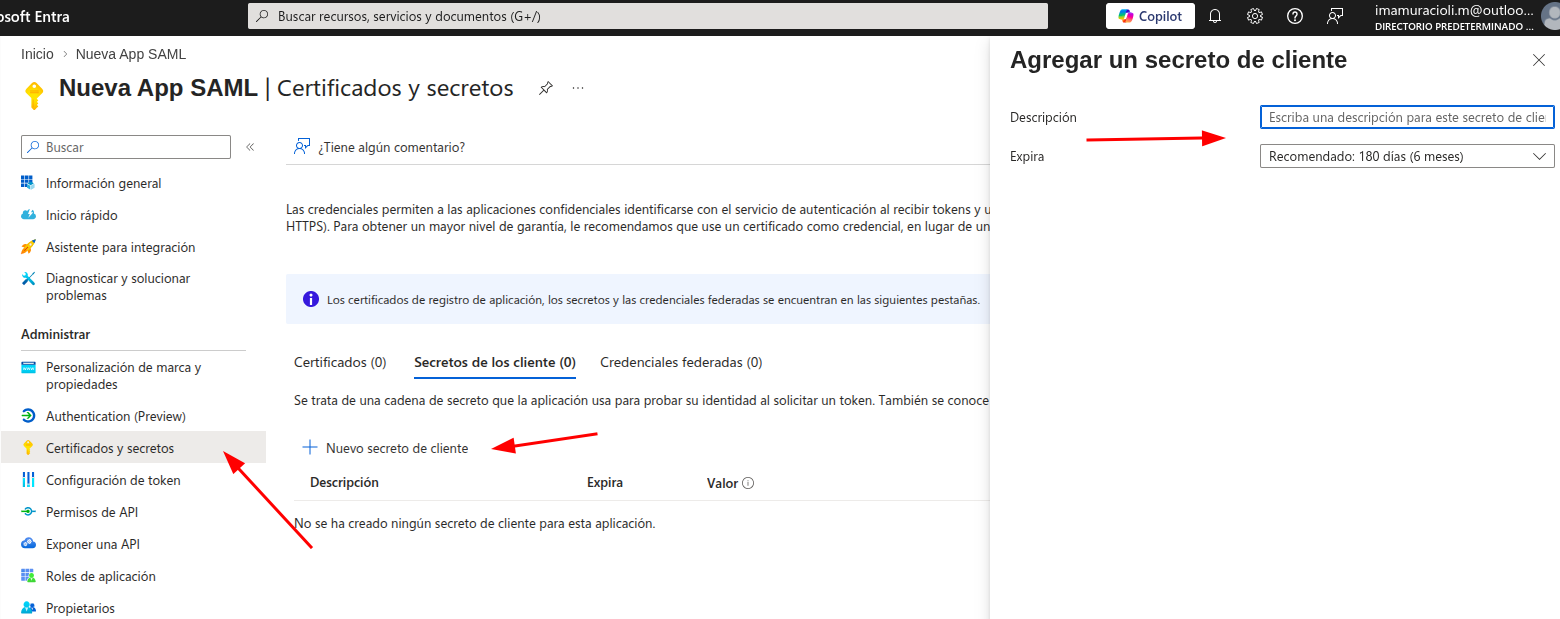
- In the same registration: Certificates & secrets → New client secret.
- Enter a description and expiration date → Add.
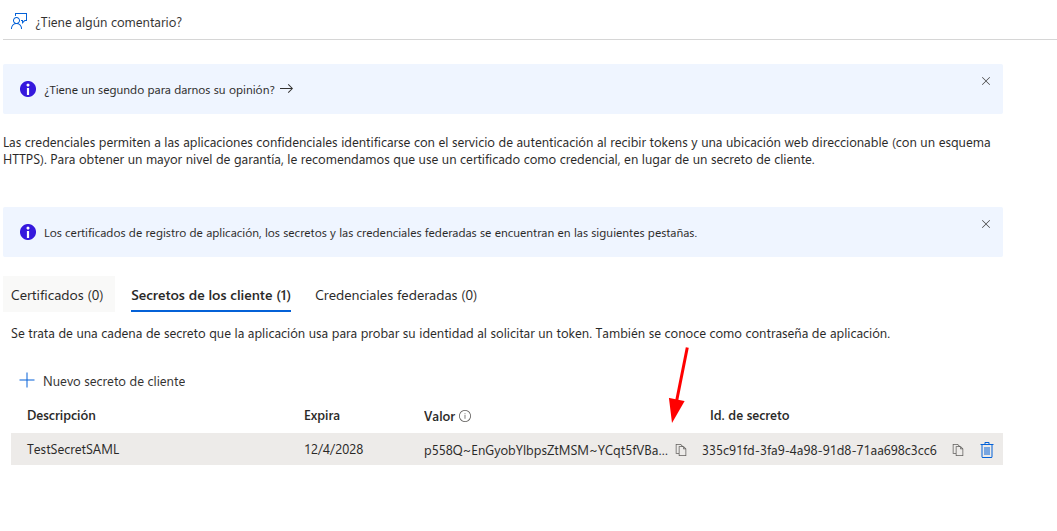
- Copy the value of the secret at that moment (you will not be able to see it again). That value is the Client secret in Gredit.
4. API permissions (Microsoft Graph)
The import in Gredit uses Microsoft Graph with application credentials (no interactive user).
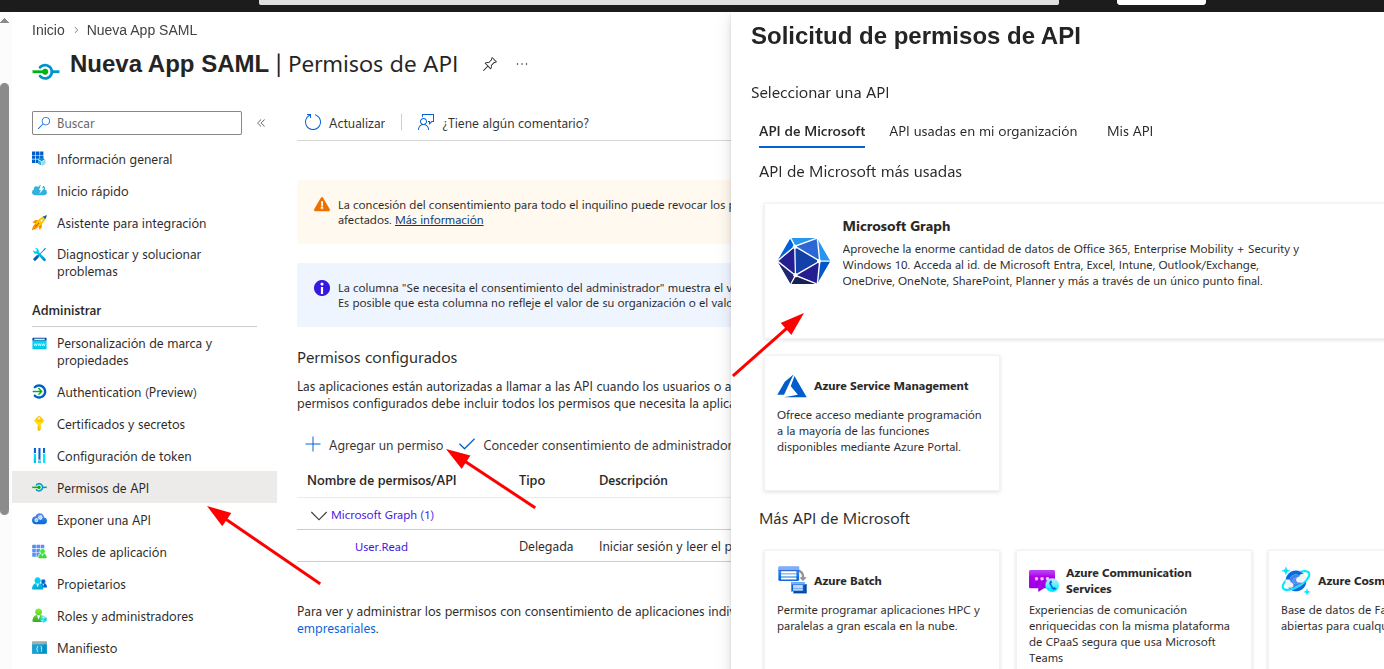
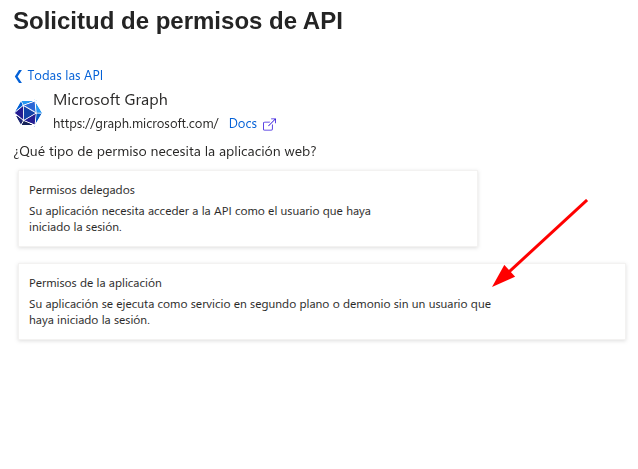
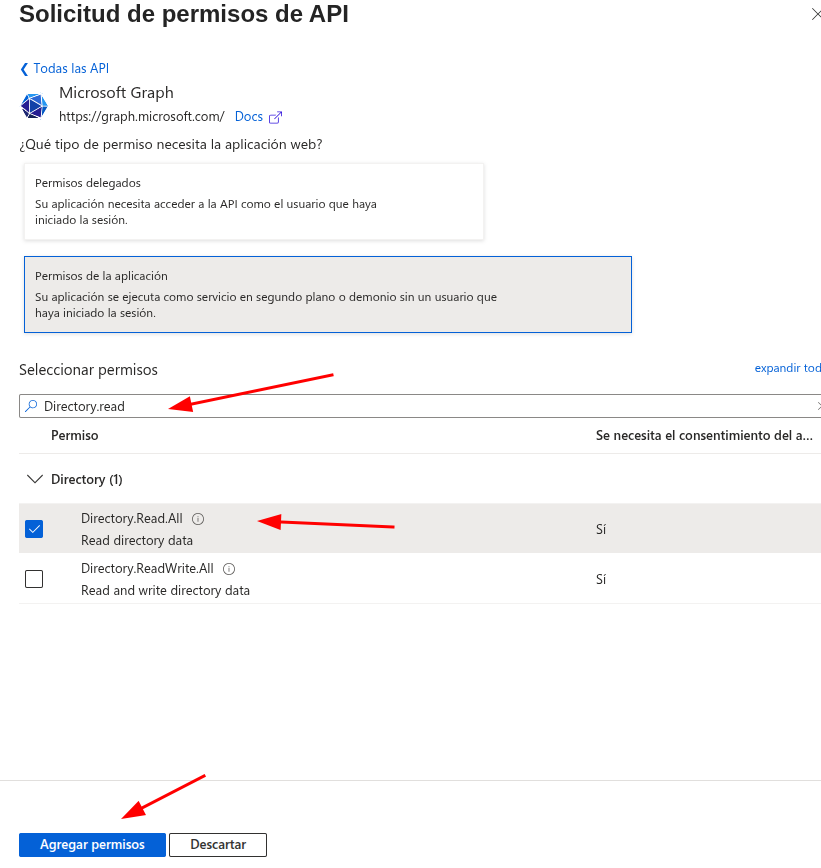
- API permissions → Add a permission → Microsoft Graph → Application permissions.
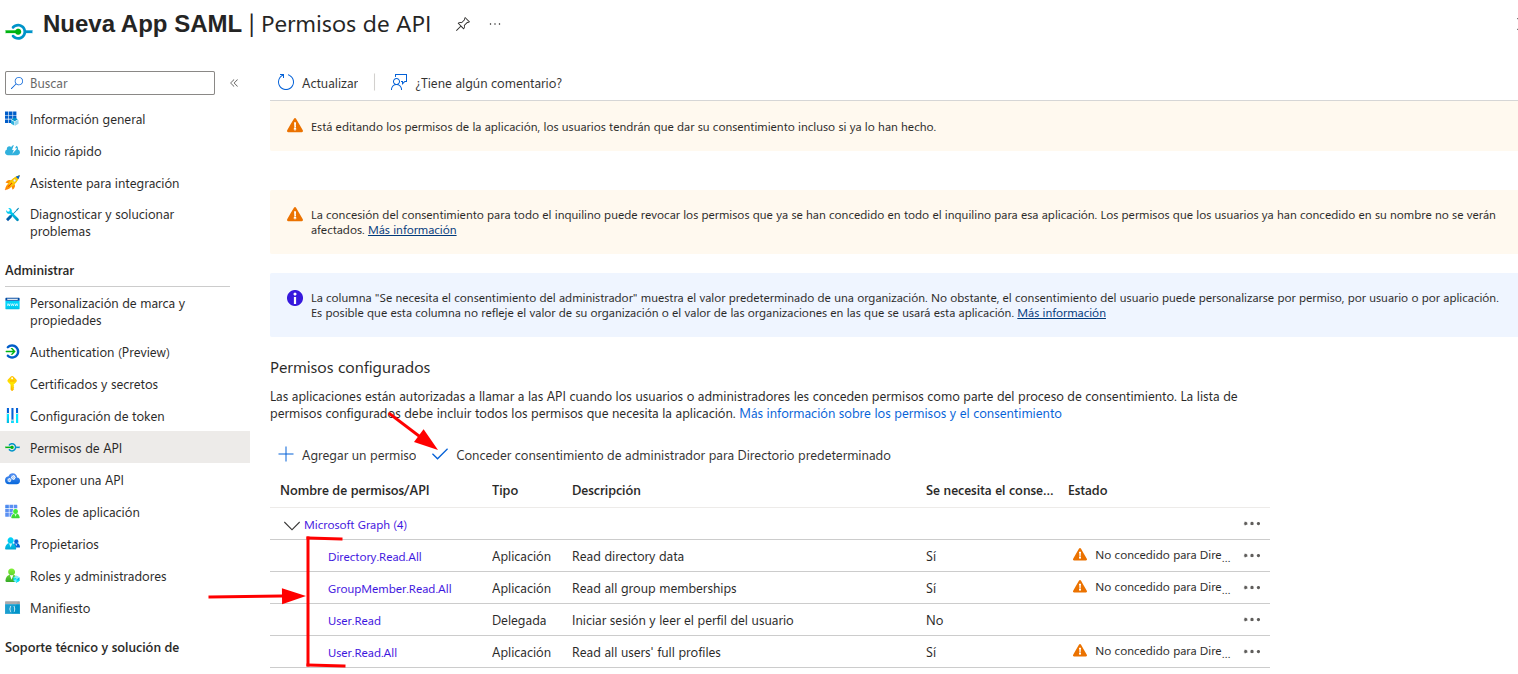
- Add the permissions needed to list group members and users (e.g.
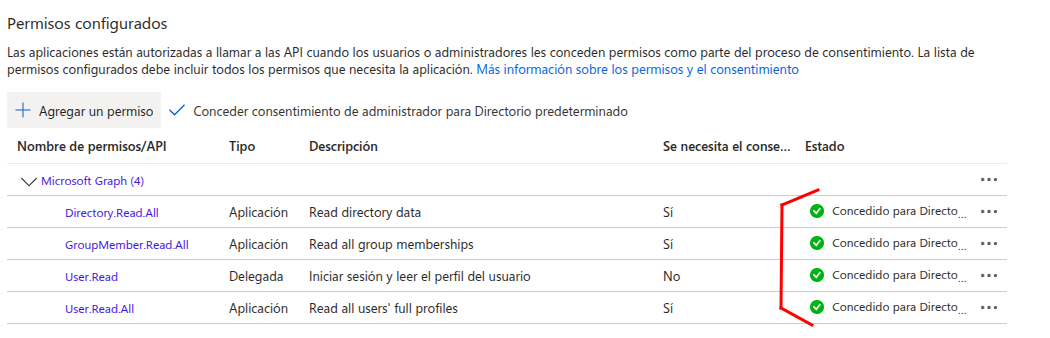
GroupMember.Read.Allor equivalents per current Graph documentation). - Click Grant admin consent for the directory.
5. Groups in Azure (reflected in Gredit as "roles")
In Gredit, each role to be synced needs the Object ID of the corresponding Entra group.
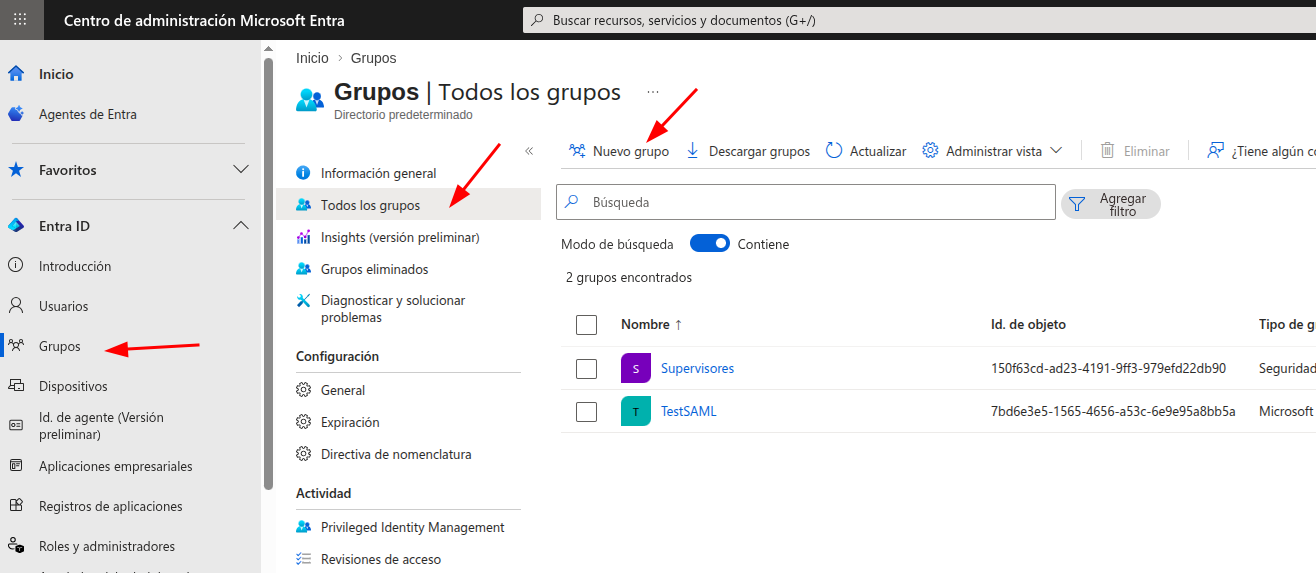
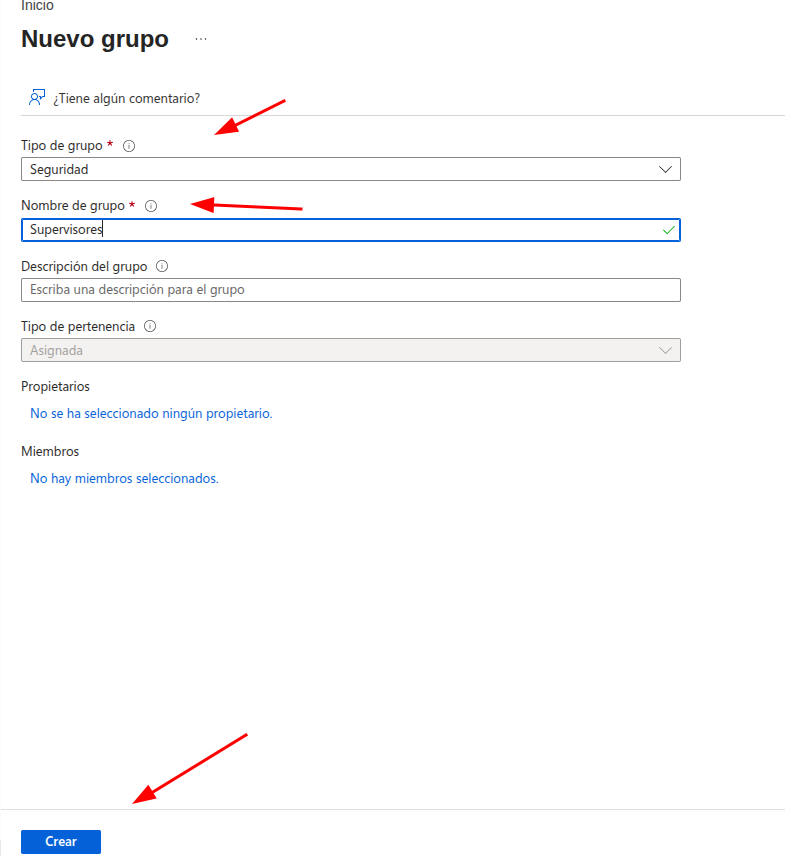
- In Entra: Groups → All groups → New group (or use existing groups).
- Typical type: Security.
- Assign members (users or rules) per your organization.
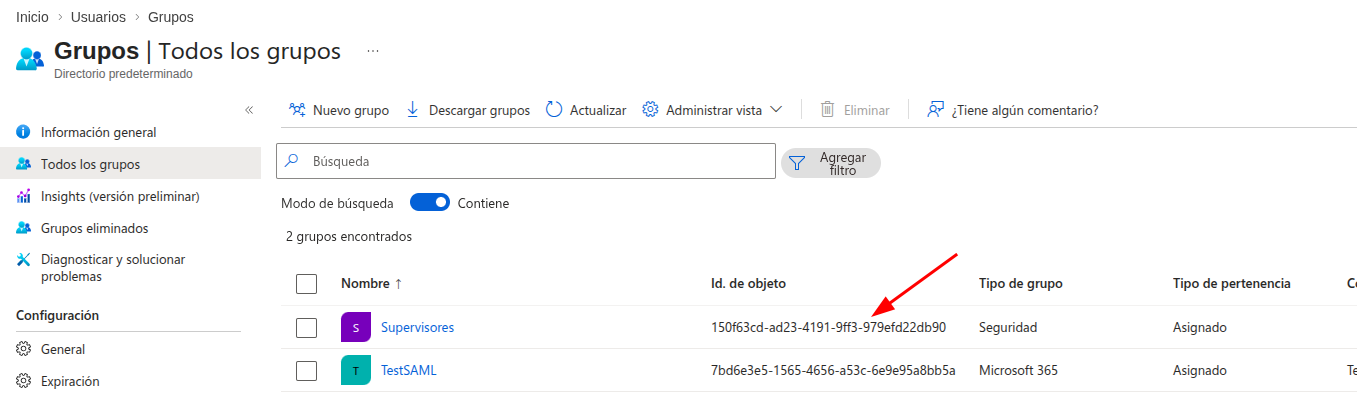
- Open the group → in Overview copy the Object ID (GUID).
- That GUID is what you will paste in Gredit in the Identifier field of the corresponding role.
- Repeat one group per role you want to sync (e.g. supervisors, auditors, etc.).
6. Users in the directory
- Users must exist in Entra (or be synced).
- They must be members of the groups to be used in Gredit.
- If a user does not belong to any group associated with a role in Gredit, they will not be included in the import.
Step 2 — Gredit
1. SAML provider configuration
- Log in to Gredit.
- Go to Configuration → SAML → Create SAML provider.
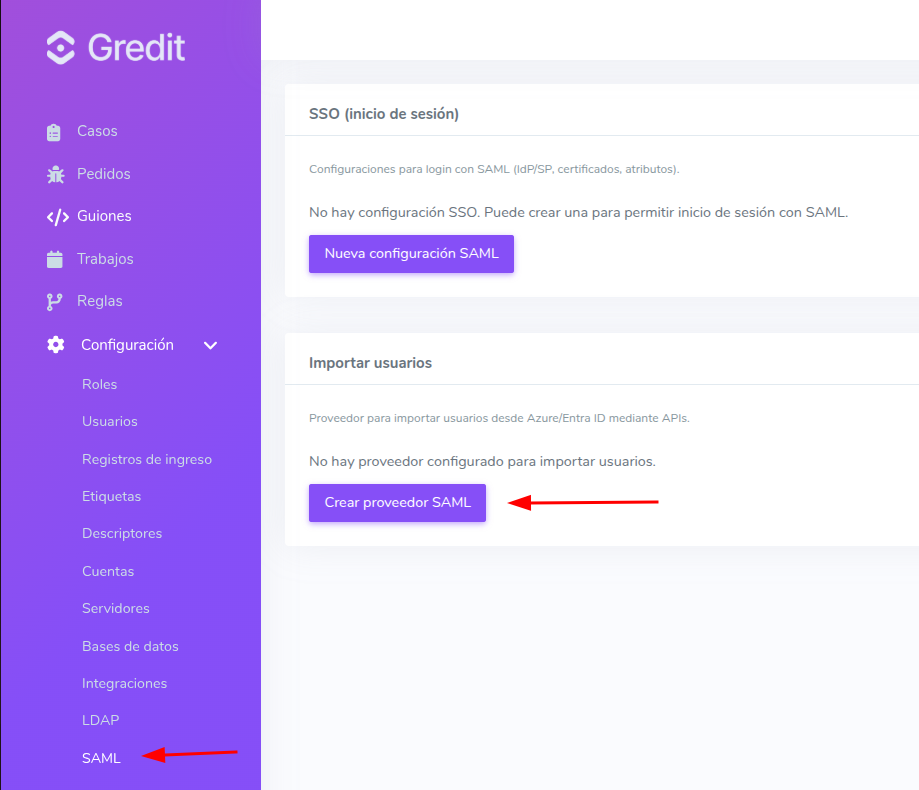
- Fill in Tenant ID, Client ID, and Client secret.
- Choose the Default role for users: this is the role applied when there is no match with roles defined by group Identifier.
- Create the SAML configuration.
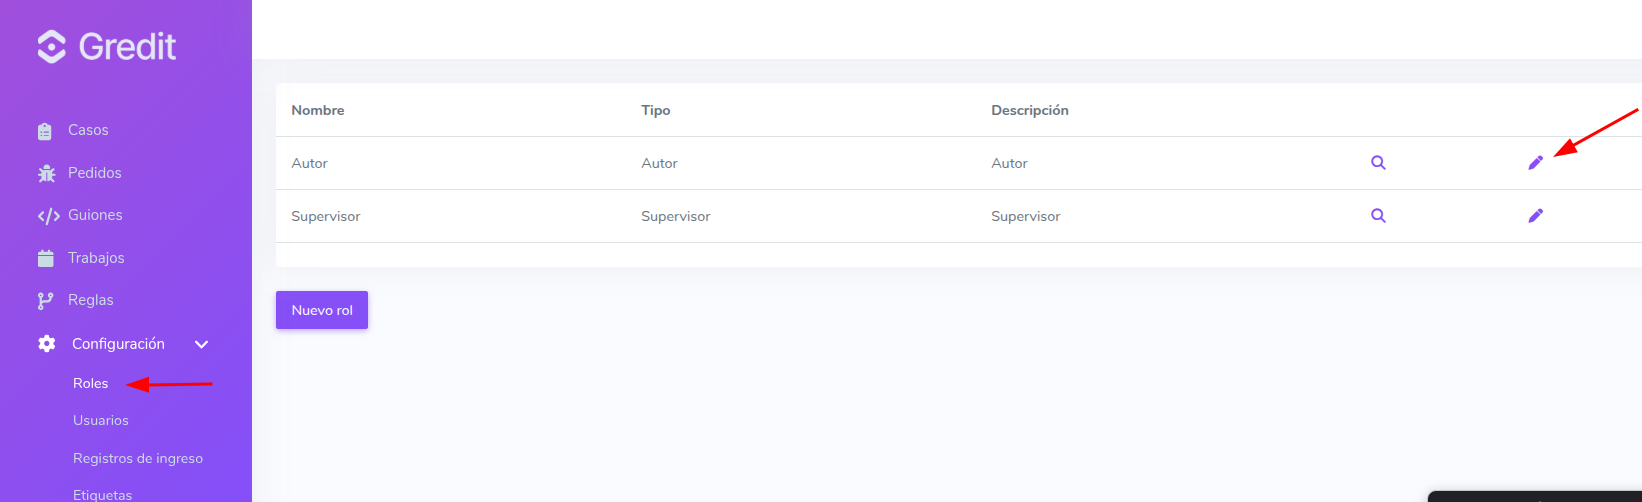
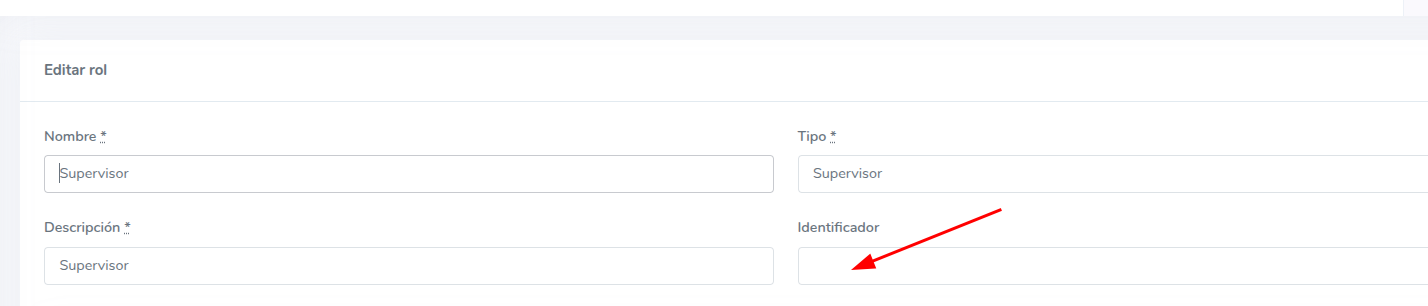
2. Roles: linking the group Object ID (essential)
- Go to Roles.
- Edit each role that should correspond to an Entra ID group.
- In the Identifier field, paste the group's Object ID (GUID).
- Save.
- Repeat for each role you want to sync with a different group.
3. Import users
- Go to Users → Import from SAML.
- Run the import.
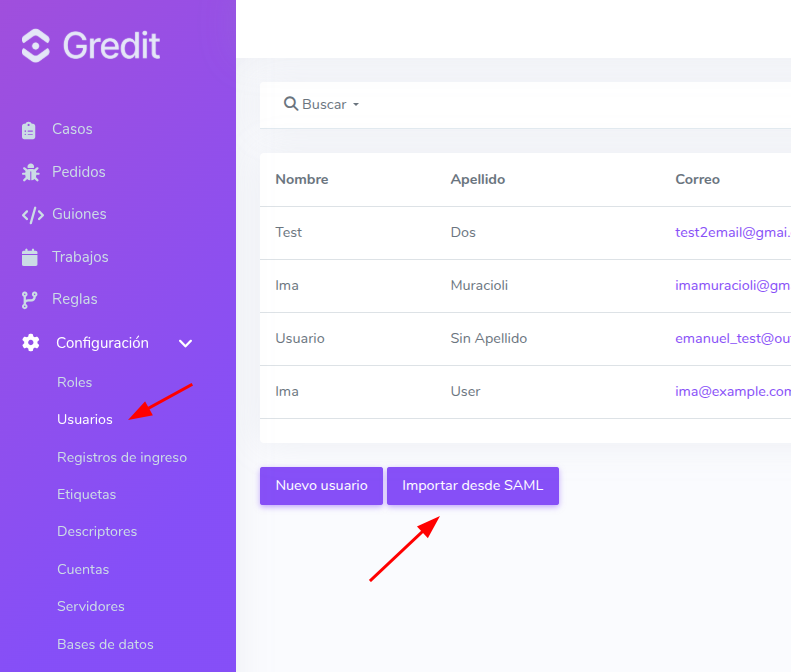
Once complete, the imported users will appear in the list.
Automatic import: the system runs a scheduled sync once per day, going through all import configurations that have complete credentials.